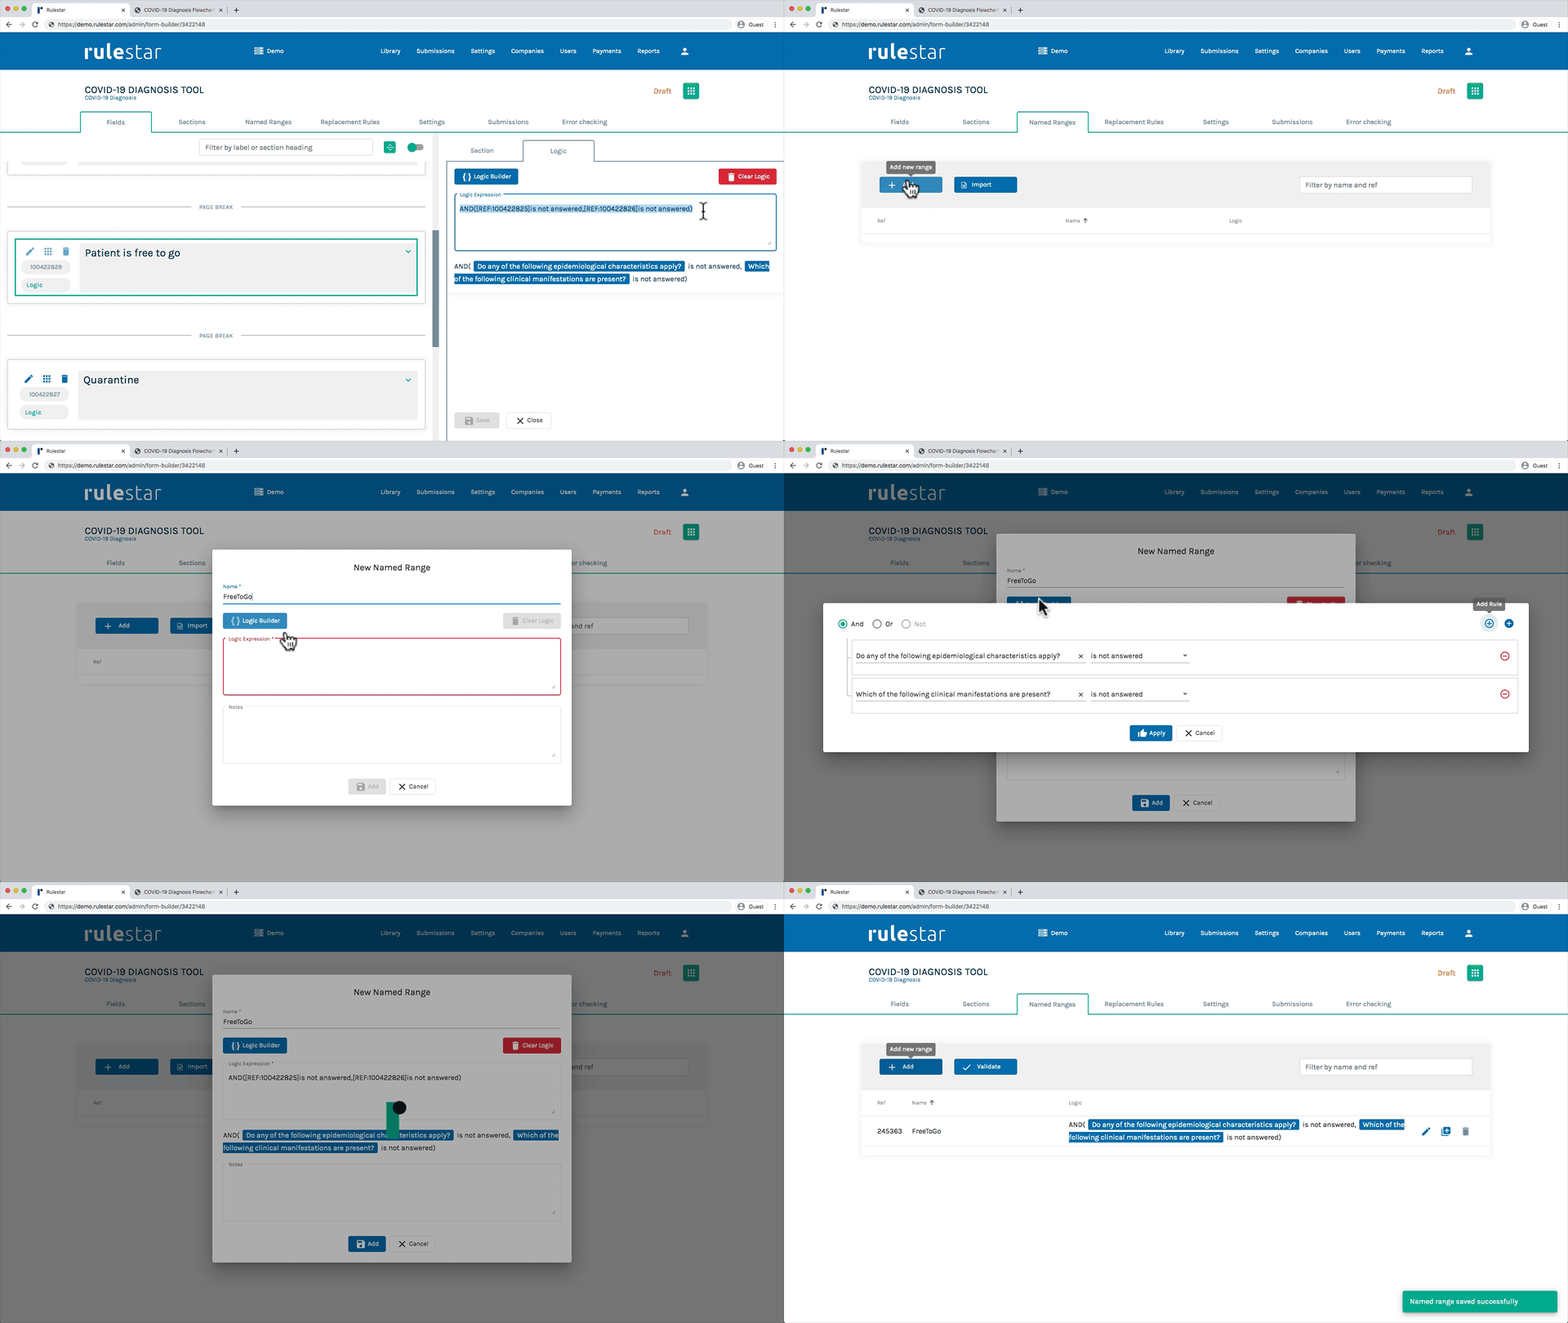
To apply logic to conditional content in your document, simply go to the "Named Ranges" tab in the builder to add your range names and define the logic that applies to them.
Adding a Named Range
From the "Named Ranges" tab in the builder, click the "Add" button to add your first Named Range and simply enter the name that you used in MS Word. To add the associated logic, you can click the "Logic Builder" button to build a new logical expression from scratch, or simply paste logic that you have copied from a section or field in the form into the "Logic Expression" box here. Then click "Add" to save your named range.
Choosing Range Names
Try to use range names that are descriptive and will make sense to people other than you.
Nested Named Ranges
A very nifty feature of the platform is that you can use the names of other ranges inside your Named Range logical expressions. See here for more detail on this.
Bulk Actions
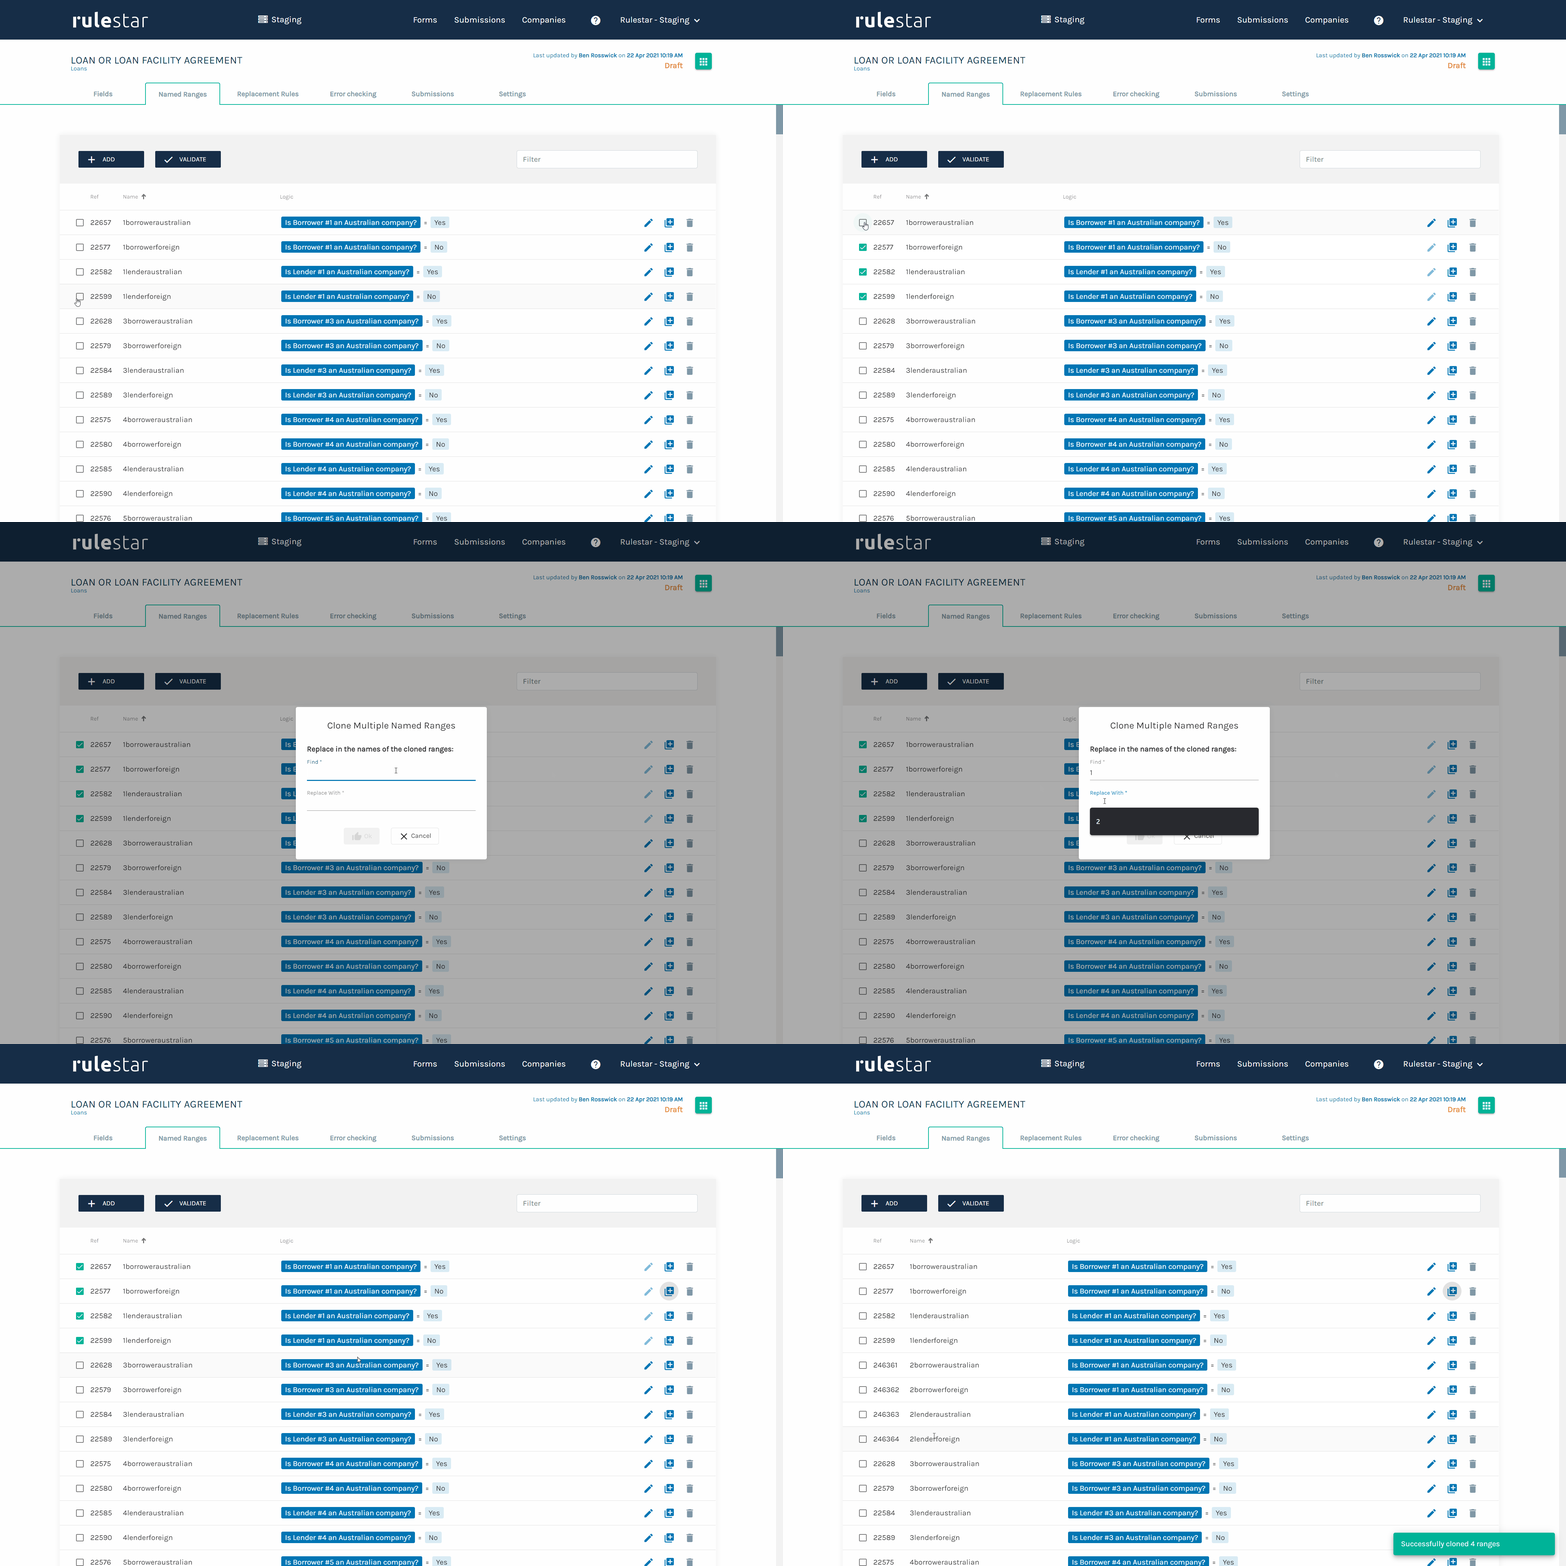
You can delete or clone more than one Named Range at a time by selecting all the ranges to which you want the action to apply.
When deleting ranges, this is a straightforward process, just select all the ranges and click the delete icon  to delete the selection.
To clone multiple ranges, you need to have at least one common character in your selection that will be replaced in the clones. For example, if you have rules that relate to 'Party 1' then you can clone all of those rules for 'Party 2' by finding '1' and replacing it with '2'. See an example of this below.


