Please note that whilst some elements of this article may be relevant to Intake Forms, we have a dedicated article that covers all the specific features of Intake Forms that may be more helpful.
A Child Form is a type of smart online form based on another form, which we'll call the "Parent Form" in this article. Child forms are used to create a copy of another form (their parent) with minor adjustments, such as hiding specific fields. Child forms automatically receive the updates that are made to their parent form. The main benefit of child forms is that you can create multiple very similar forms whilst only having to maintain one parent (both form and template). No new sections or fields can be added to a child form, nor can sections and fields in a child can be ordered differently to the parent.
A simple example of a child form is one created for users in a particular jurisdiction eg, a single State or Country where there are broad similarities to other jurisdictions. In this way, you can create a single 'Parent' that holds all the fields for all the jurisdictions and just make minor changes to each child to cater to the individual jurisdiction.
Creating a child form
To create a child form:
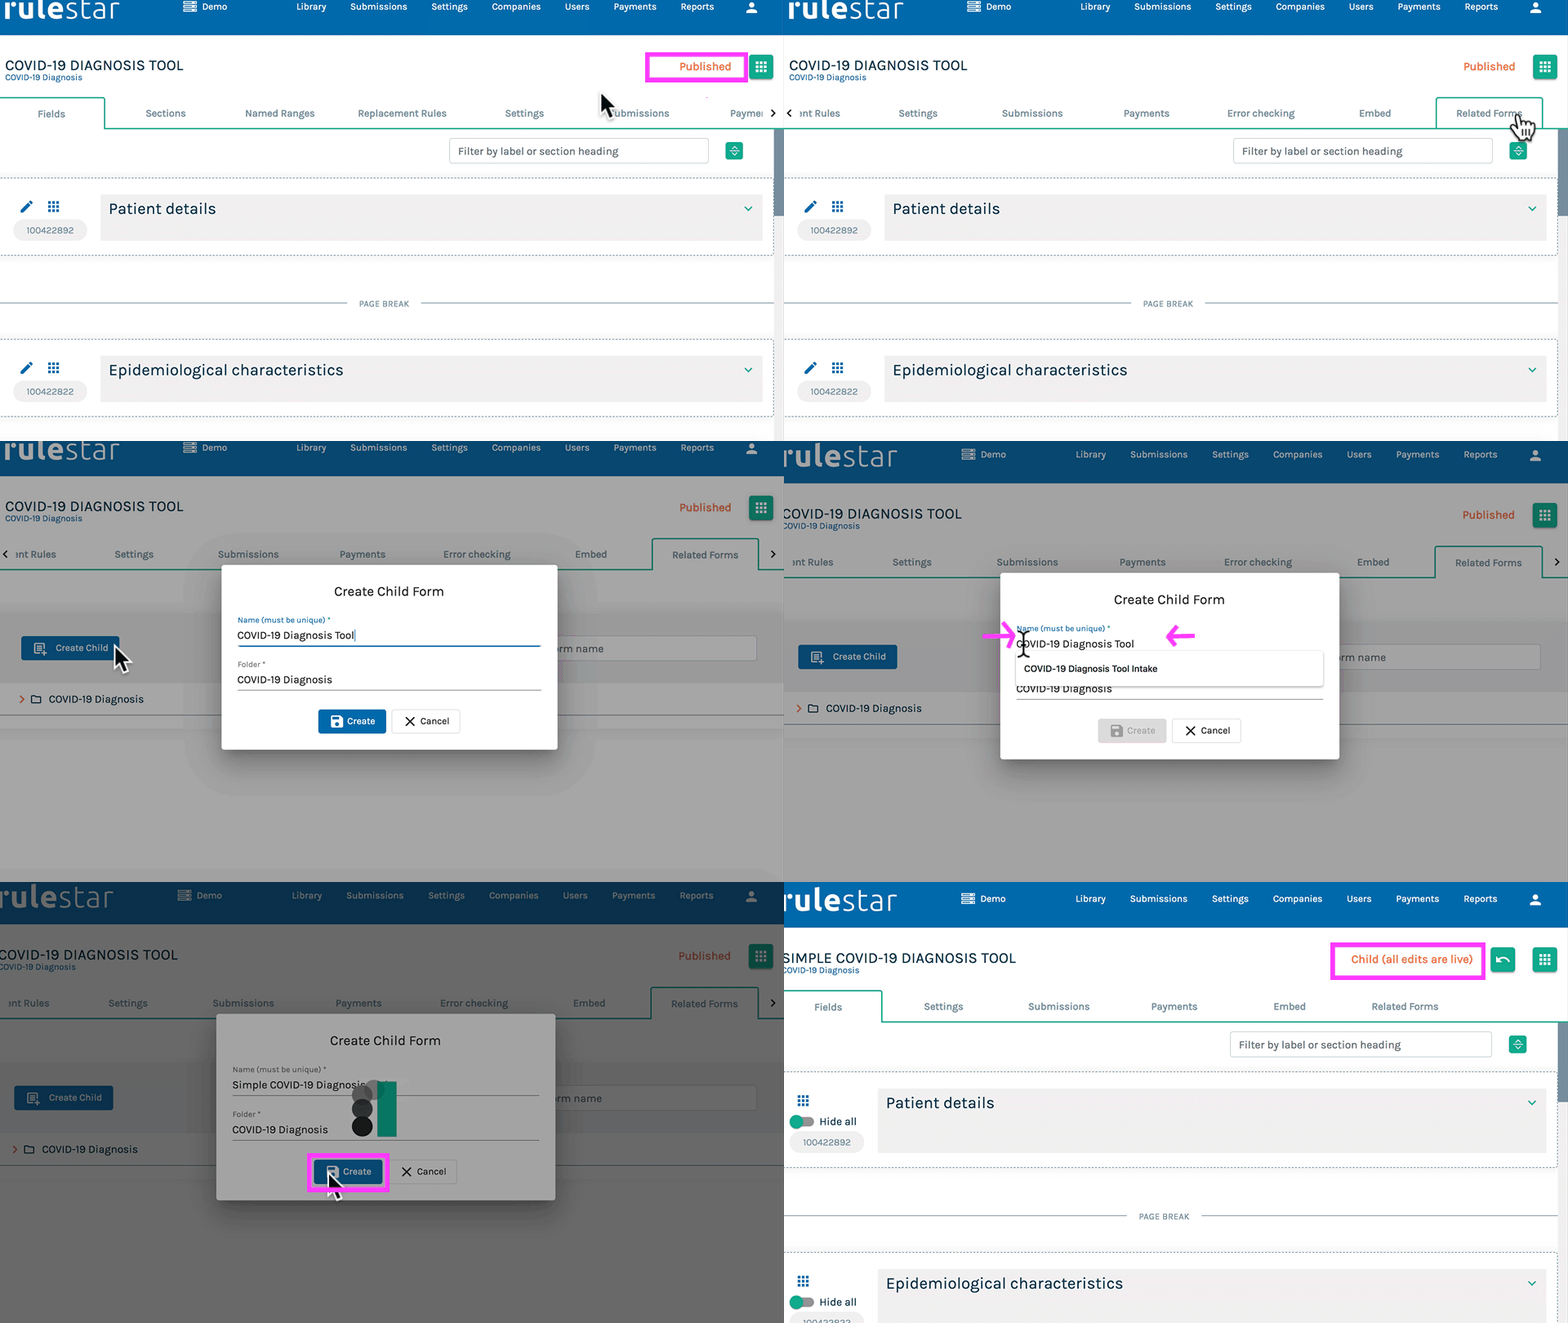
- Navigate to a published or unversioned form.
- Select the "Related Forms" tab. If it is not visible, click on the arrow at the right end of the tab ribbon to see more tabs.
- Click "Create Child".
- Enter a name for your child form. The name usually suggests what is specific to the child eg, if it is for NSW only, add "NSW" to the title.
- Confirm by selecting "Create".
You will be directed to the newly created child form. You will see "Child (all edits live)" as the form version.
Customising a Child Form
A child form can be customised in four ways:
- Changing the label of that field.
- Hiding fields that you don't want to be displayed.
- Changing a "required" field to "optional".
- Selecting a default value.
Changing the label of a Child Form will not impact the logic of the form nor the merge fields in the template. The changes will be reflected when the form is previewed or embedded but have no further consequences. This can be useful for creating forms that have the same aim and mechanics but target different audiences. Thus you can use language appropriate to one audience in one child and different language in another child.
Before you can hide a required field it's best to consider whether you should enter a default value as this may affect logic in subsequent Fields and Sections. Default values provided in a child form will only impact the child form. The changes do not flow back to the parent form.
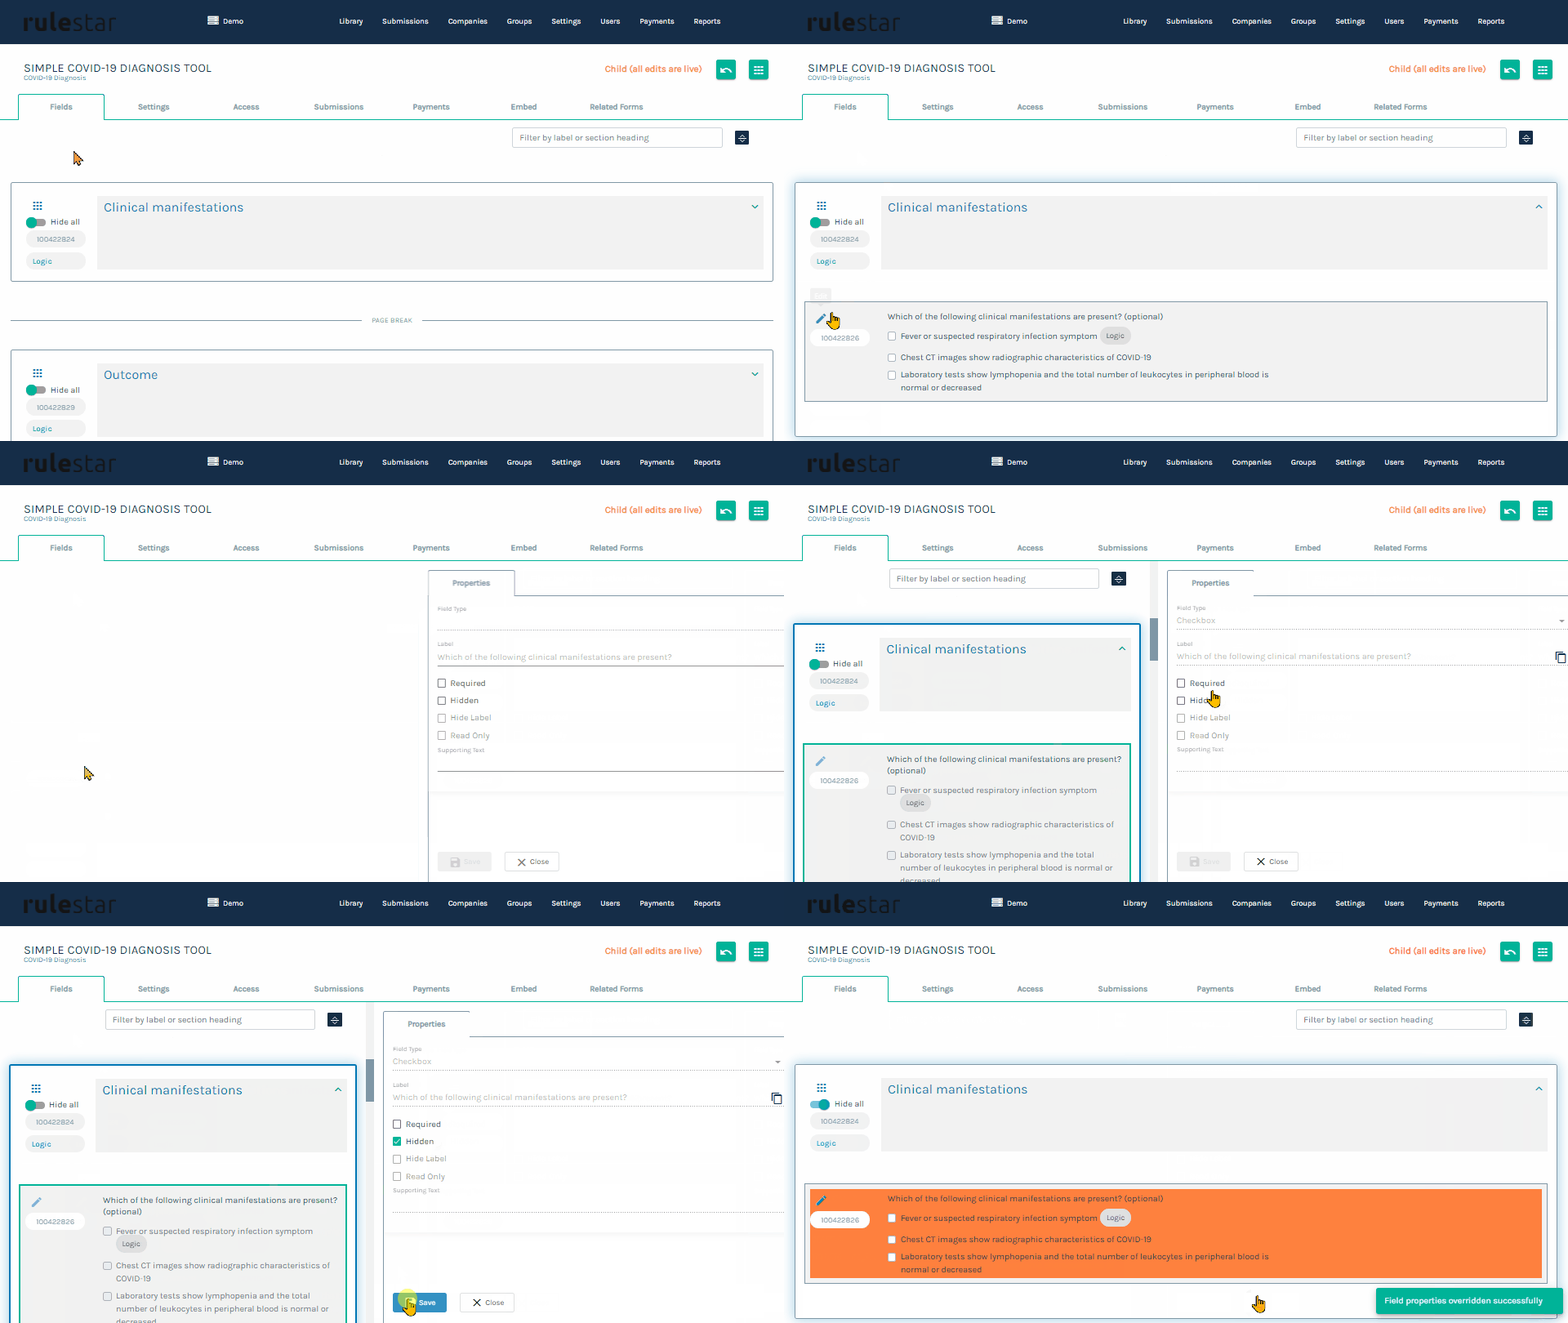
To hide an individual field:
- Go to "Properties" by selecting the pencil.
- Select "Hidden". Once a field is hidden, it will display as an alternative colour.
To hide a whole section (and all fields in the section) select the "hide all" toggle.
Note: Once a field has been amended in a Child Form, any changes made in the corresponding field in the Parent will no longer be reflected in that Child for the 4 attributes listed above. Hence, hiding a field in the child and then changing the label in the parent will mean that the child's label needs to be changed manually.
Reviewing a child form
You can access a child forms directly from the library in the same folder as their parent form (by default, they can be moved folders). Alternatively, you can:
- Navigate to the parent form.
- Select "Related Forms" from the tab ribbon.
- Open the folder where the child form is saved (usually the same as when the parent is saved)
- Select the desired child form.
You can return to the parent form by selecting the "Go back to parent form" arrow on the top right of the builder.


.gif?width=688&height=387&name=hide%20section%20(child).gif)